
Day 5: Make your first crochet winter hat and learn double crochet
- Kavitha
- Apr 8
- 4 min read

Updated: Apr 13

You have come a long way in just a few days. From your first chain to creating things you can use and wear. Today, you will bring everything together. You will learn a new stitch and make your very first winter hat.
What You Will Make
A simple crochet winter hat using double crochet, finished with a cute flower detail.
Techniques You Will Learn
Double crochet (DC)
Slip stitch (for joining in the round)
Measuring for a perfect fit
Working in rounds
Closing the top neatly
Adding simple embellishments
What You Will Need
Yarn (any color of your choice)
Crochet hook
Scissors
Yarn needle
Cardboard or fingers (for pompom)

Step 1: Measure for Your Hat
Measure around your head where the hat will sit.
For an average adult:
Head circumference: 52 to 56 cm (20.5 to 22 inches)
Your foundation chain should match this measurement.
💡 The chain should feel comfortable, not tight.
Step 2: Make Your Foundation Chain
Start with a slip knot and Chain 60 to 70 stitches (adjust based on your measurement)
Check before joining:
Wrap the chain around your head
Make sure it is not twisted

Step 3: Join with Slip Stitch
Now you will form a circle.
Insert your hook into the first chain

Yarn over and pull through both loops

This is called a slip stitch
You now have a round base to start your hat.

Step 4: Learn Double Crochet (DC)
This is your new stitch for today.
Take your time with this stitch. It may feel new at first.
Step 5: Build the Hat
Chain 2

Make a Double Crochet in each chain
Double Crochet Steps:-
Yarn over

Insert hook into stitch

Yarn over, pull through

Yarn over, pull through 2 loops


Yarn over, pull through the remaining 2 loops


Continue on all the chains

When you reach the first chain, slip stitch to the first chain.

Slip Stitch
Insert the hook into the chain

Yarn over and pull through both the loops.

Chain 2 at the start of each round (counts as height)
Work 1 double crochet in each stitch all around

As we did for the single crochet rows, insert the hook under the V-shape stitches

Slip stitch at the end of each row.


Continue for:
12 to 15 rounds approximately
Check as you go:
The hat should start forming a soft tube
Try it on to see the length
Change the color to white yarn.

Chain 1

Make single crochet stitches in the back loop only.
Usually, you insert the hook under the V-shaped stitches. For this pattern, you will insert into the loop away from you, called the back-loop, as shown.
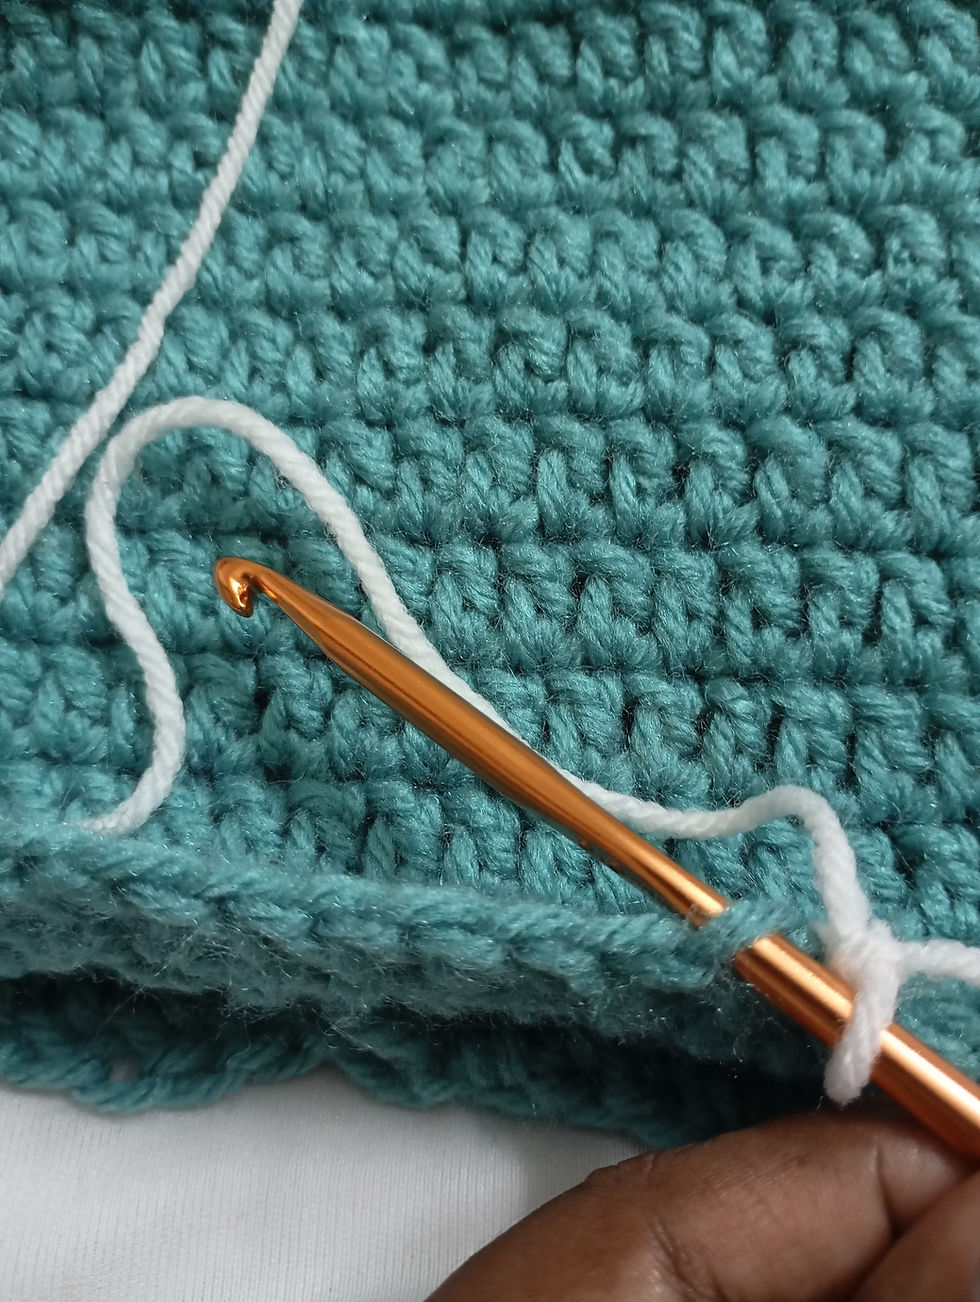
Continue with the single crochet stitches, inserting the hook into the back loop. This will give a texture. If you find this difficult, you can insert into the V-shaped stitches and make the ordinary single crochet instead.


You can make 4 such single crochet rows.
At the end of each row, make a slip stitch and chain 1.


Once the 4 rows are done, fasten off and weave in the ends.

Step 6: Close the Top
The blue yarn:-
Cut a long yarn tail
Thread it through your yarn needle
Weave through the top stitches:
Go in and out around the circle
Gently pull to close
Secure tightly and weave in ends.
Let us see this step by step.

Flip the hat inside out. You will now be working on the wrong side.
Using a yarn needle, sew around as shown.

Pull it tight.

Make a few such rounds, pulling tight.

In the end, move to the top-most part of the hat and go around.

Pull tight.

Chain 1, fasten off, and weave the ends.

Now flip your hat.


Step 7: Make a Simple Flower
This is easy and beginner-friendly.
Chain 5

Slip stitch into the first chain and make a ring.


Chain 3

Make 11 Double crochet stitches into the ring

Slip stitch to the first chain
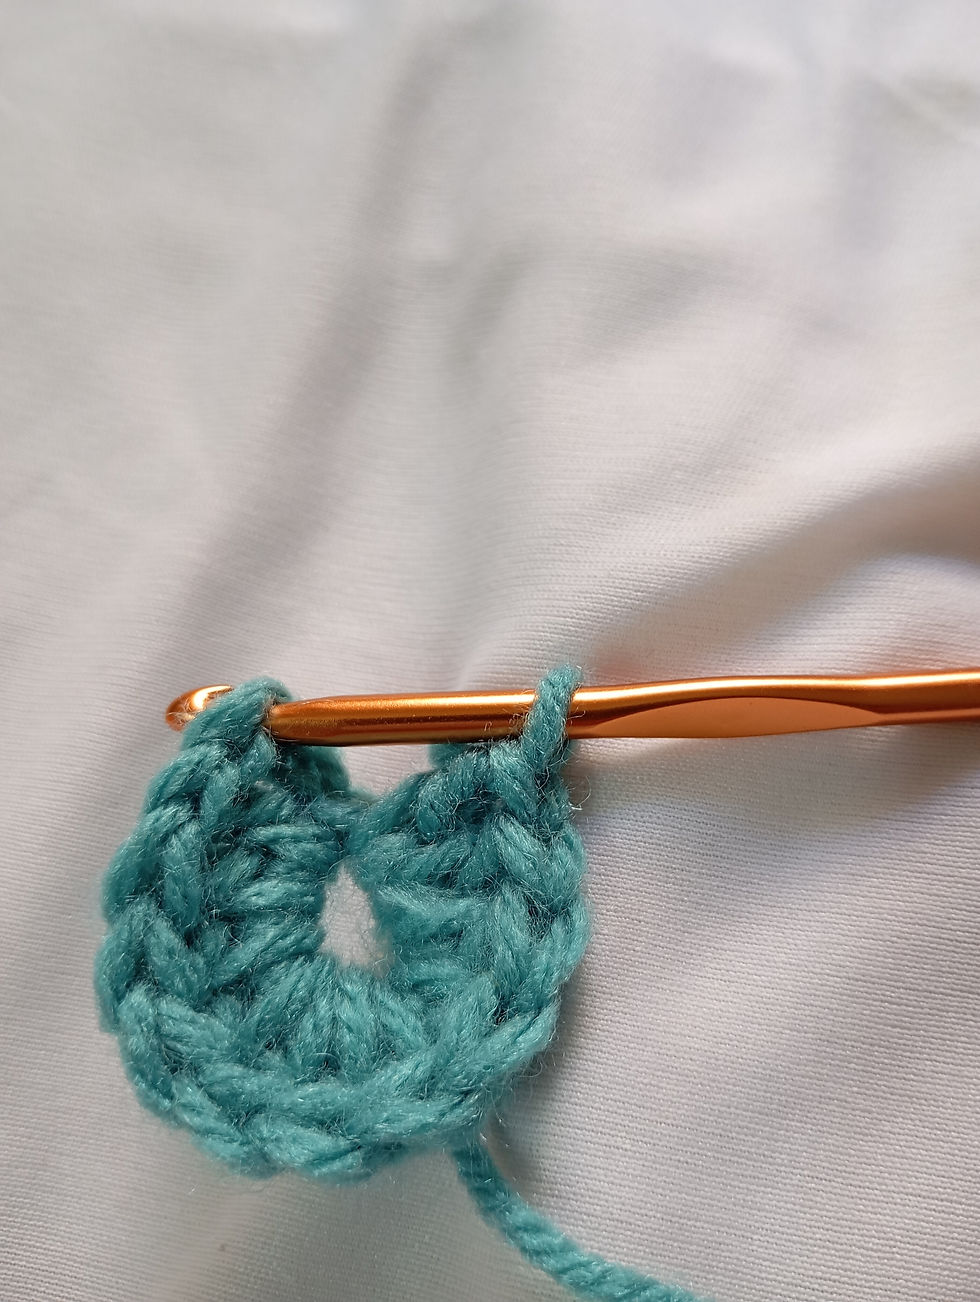
Fasten off and weave in ends.


Insert a white yarn on any of the double crochet stitches and make a knot.


Chain 12

Slip stitch into the same stitch.

Slip stitch into the next stitch.
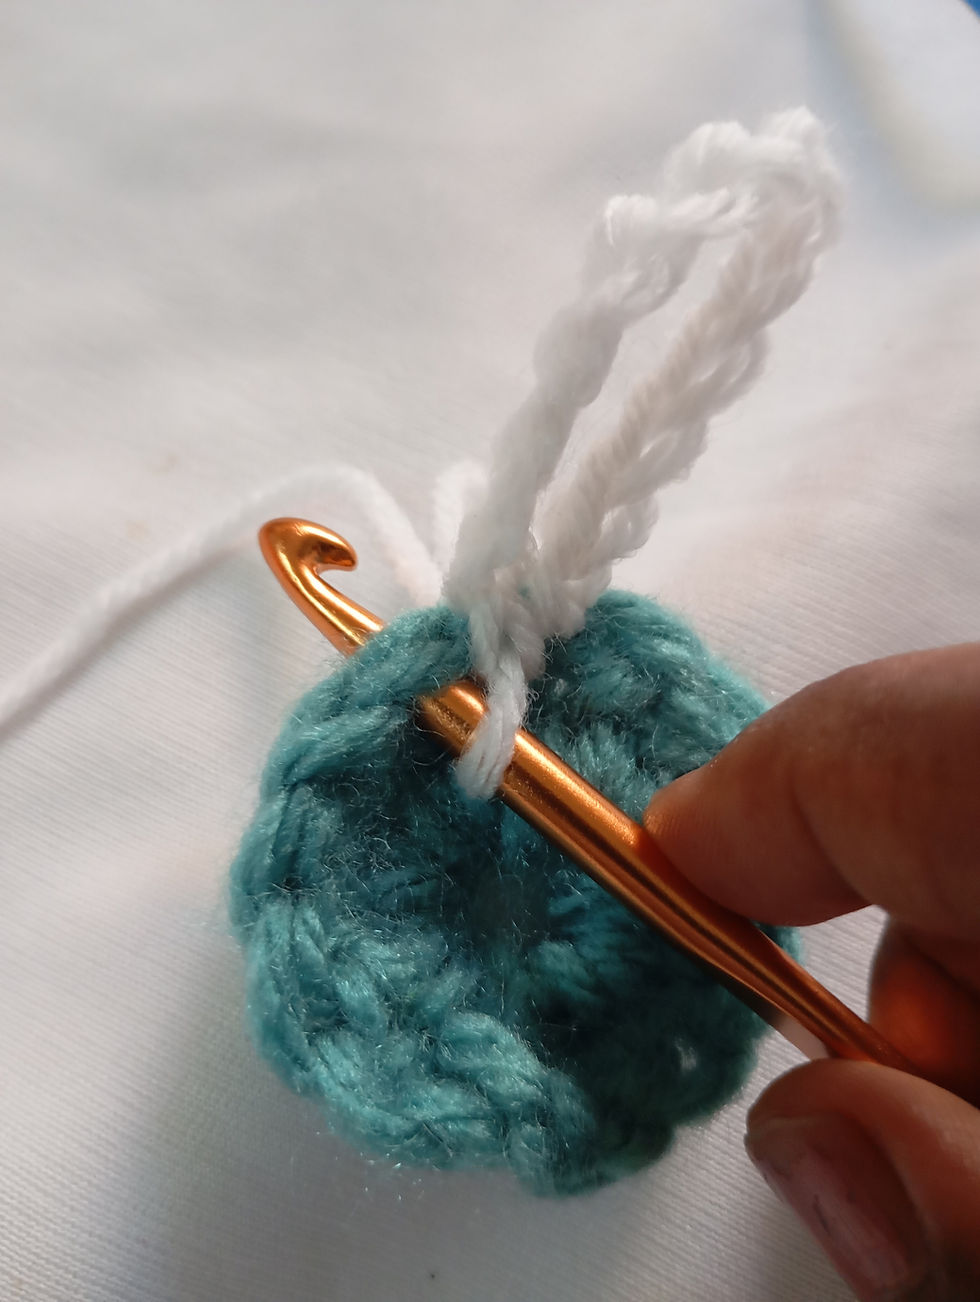
Chain 12

Continue to form the petals of the flower.


In the end, slip stitch, chain 1, and fasten off, and weave in the ends.


A cute flower is ready :)
If you feel this flower pattern is overwhelming, you can use the same bow pattern you used with the headband.
Step 8: Attach the Flower
Place the flower on the side of your hat
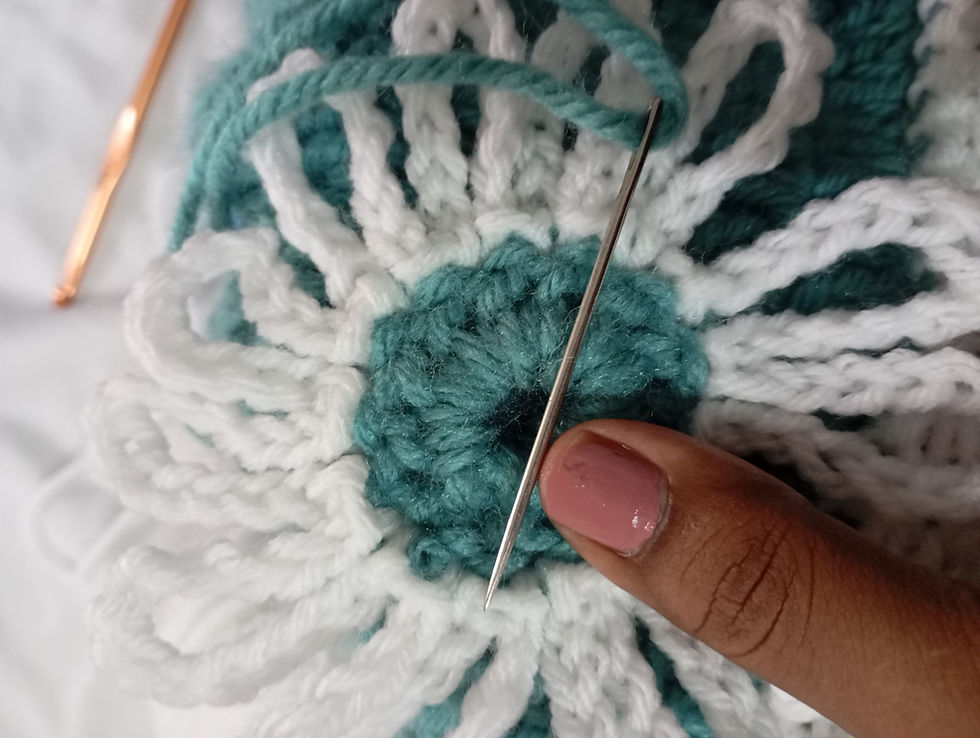
Stitch it securely using your yarn needle

Your cute little cozy hat is ready :)

What You Have Learned Today
✔ Double crochet stitch
✔ Slip stitch for joining
✔ Working in rounds
✔ Shaping and closing a project
✔ Adding decorative elements
A Small Note From Me
Your hat may not look perfect, and that’s okay.
Just a few days ago, you were following steps and figuring things out.
Today, you understand what you are doing. You can start, build, shape, and finish a project on your own. From your first chain to this hat, you have shown up, stayed patient, and kept going. Now you have not just learnt crochet, but you are someone who can create with it. Don’t stop here.
This is where your crochet journey truly begins. 🧶✨

Hi Kavitha,
Your 5-day crochet class was truly amazing! I gained a lot of ideas, motivation, and a deeper interest in crochet. The projects you selected were very useful, especially for beginners like me.
Everything was explained so clearly with the help of pictures, which made it easy to follow. I’m excited to try all your projects.
Great work and effort—thank you for such a wonderful learning experience!