
Day 3: Create an easy crochet pouch and learn to measure your work
- Kavitha
- Apr 6
- 3 min read

Updated: Apr 10
You have been working with flat pieces so far. Today, you will use the same stitch (single crochet) and turn it into something useful. This is where crochet starts to feel real. You will be making a small pouch to store your crochet hooks. Something simple, practical, and completely handmade by you.

What You will Make
A crochet hook pouch that can hold your basic tools neatly. You can also use it as: -
Pencil / pen case
Knitting needles case
Makeup brushes pouch
Paintbrush holder
Toothbrush & toothpaste pouch
Comb & hair accessories case
Sunglasses case
Charging cables & earphones organizer
Small toiletries pouch
Art supplies holder (markers, sketch pens)
Kids activity pouch
Small tools organizer (scissors, needles)
Minimalist clutch (cash, keys).
Techniques You will Learn
Single crochet in rows with better consistency
Measuring your work for a purpose
Turning a flat piece into a 3D item
Basic assembling and finishing
Adding a simple closure (button or bead)
What You’ll Need
Yarn
Crochet hook
Scissors
Yarn needle
Needle and thread
1 button or a bead

Step 1: Measure for Your Hooks
Place your crochet hooks together.
Average hook length is around 14–15 cm (5.5–6 inches)
Your pouch height should be about 16–18 cm (6.5–7 inches) to allow a flap
Width depends on how many hooks:
For 5–6 hooks → about 12–14 cm (5–5.5 inches)
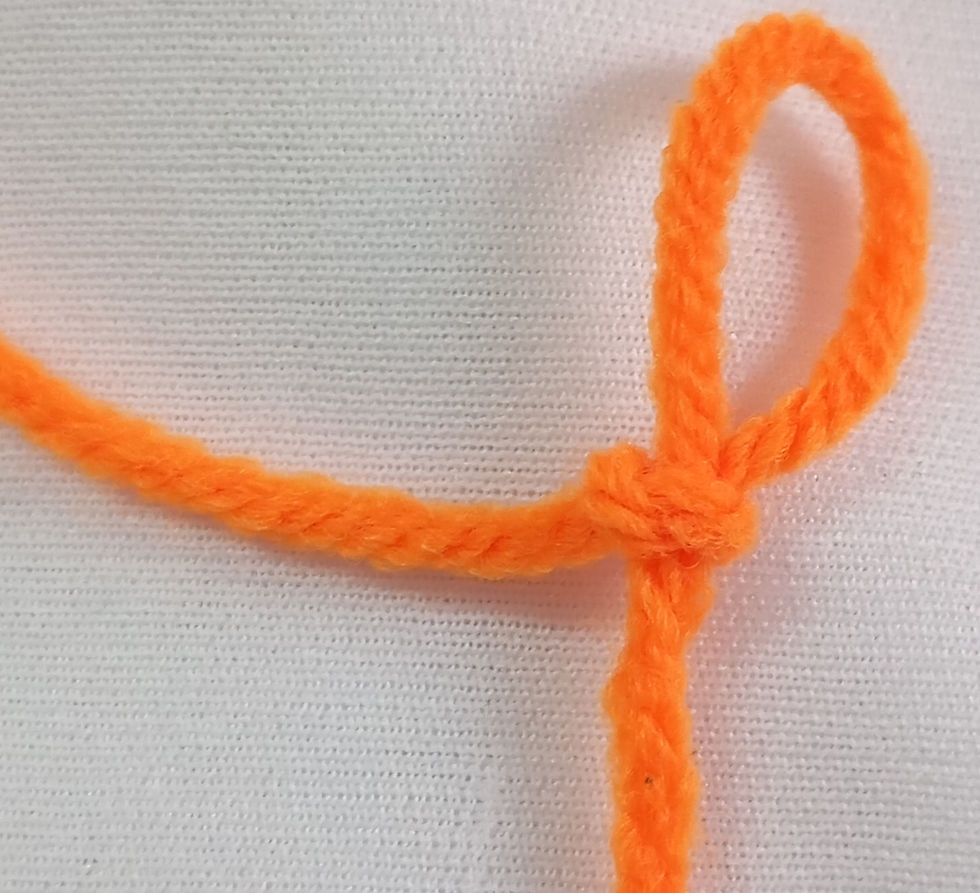
Step 2: Make Your Foundation Chain
Start with a slip knot:
Chain 20 to 25 stitches (for medium thickness yarn)
This should give you a width of around 12–14 cm.
Hold it against your hooks to check. Adjust if needed:
Too small → add chains
Too wide → reduce chains

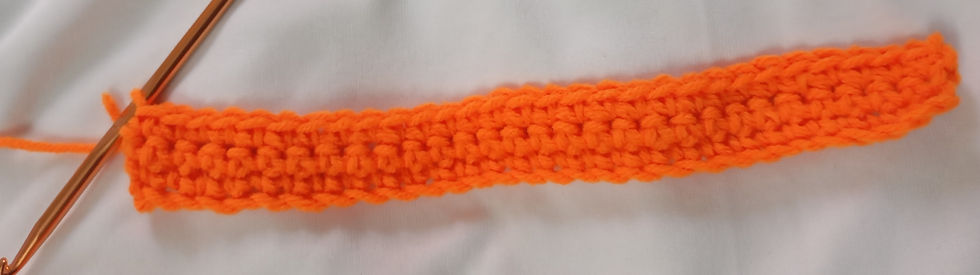
Step 3: Build Your Fabric
Row 1: Single crochet in the 2nd chain from hook and across
You should have around 19–24 stitches, which is one stitch less than the number of chains
Continue working 1 SC in each stitch
Turn at the end of every row and chain 1 for the height. Work for:
25 to 30 rows approximately
This should give you enough height to:


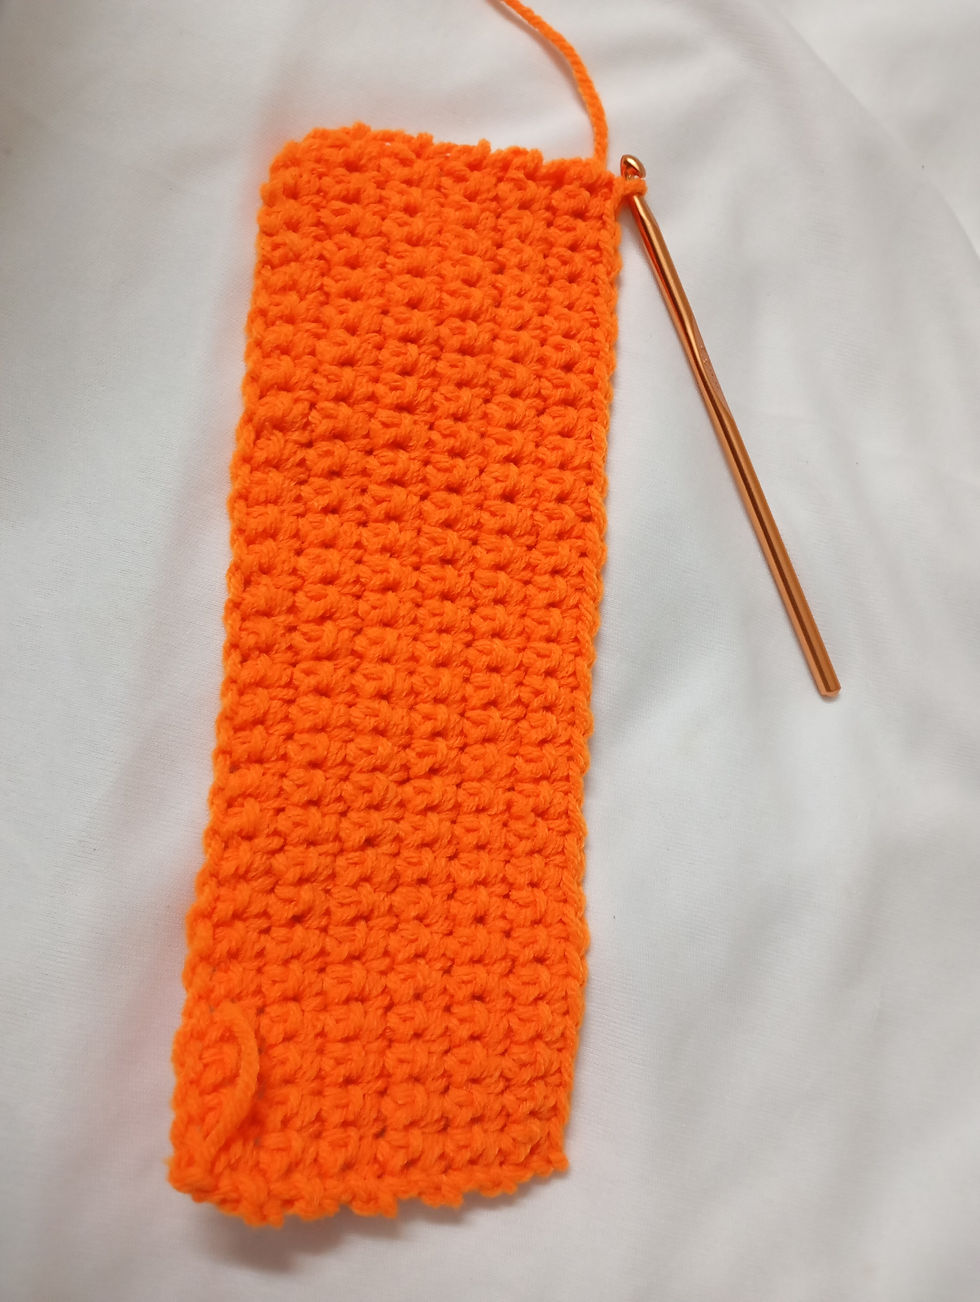
Step 4: Check Before Finishing
Place your hooks and fold:
Bottom part forms the pouch
Top part becomes the flap
Adjust if needed:
Too short → add a few more rows
Too long → you can still use it, just fold deeper
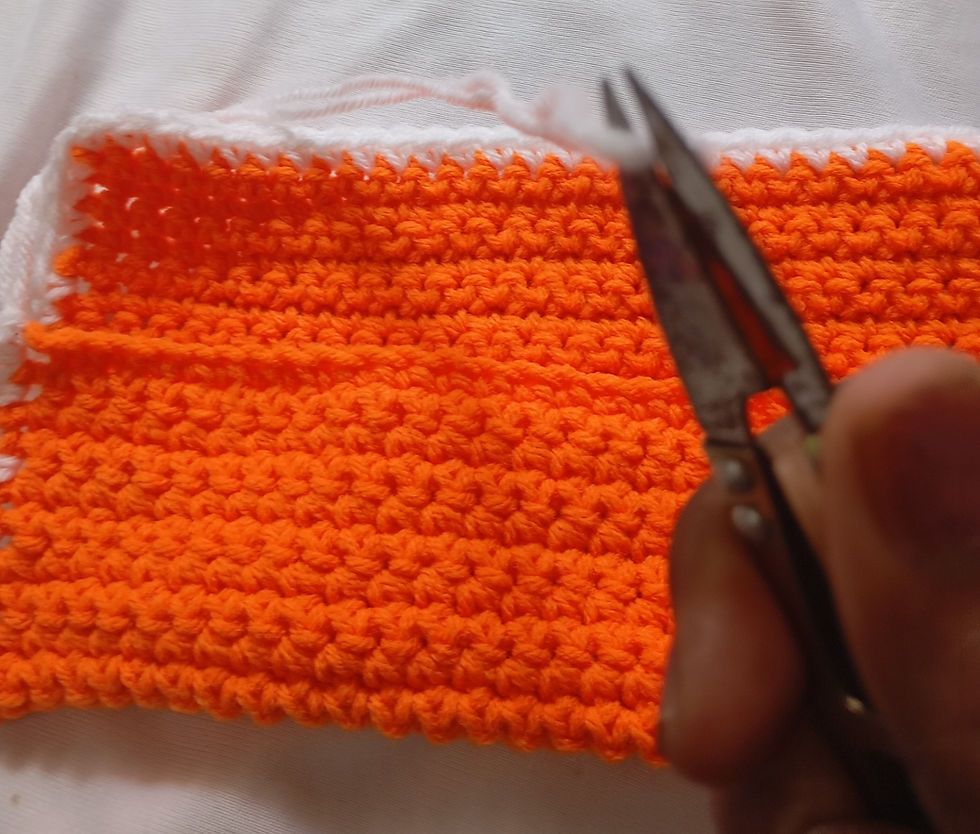
Step 5: Finish Your Work
Cut yarn and pull through
Leave a long tail for stitching

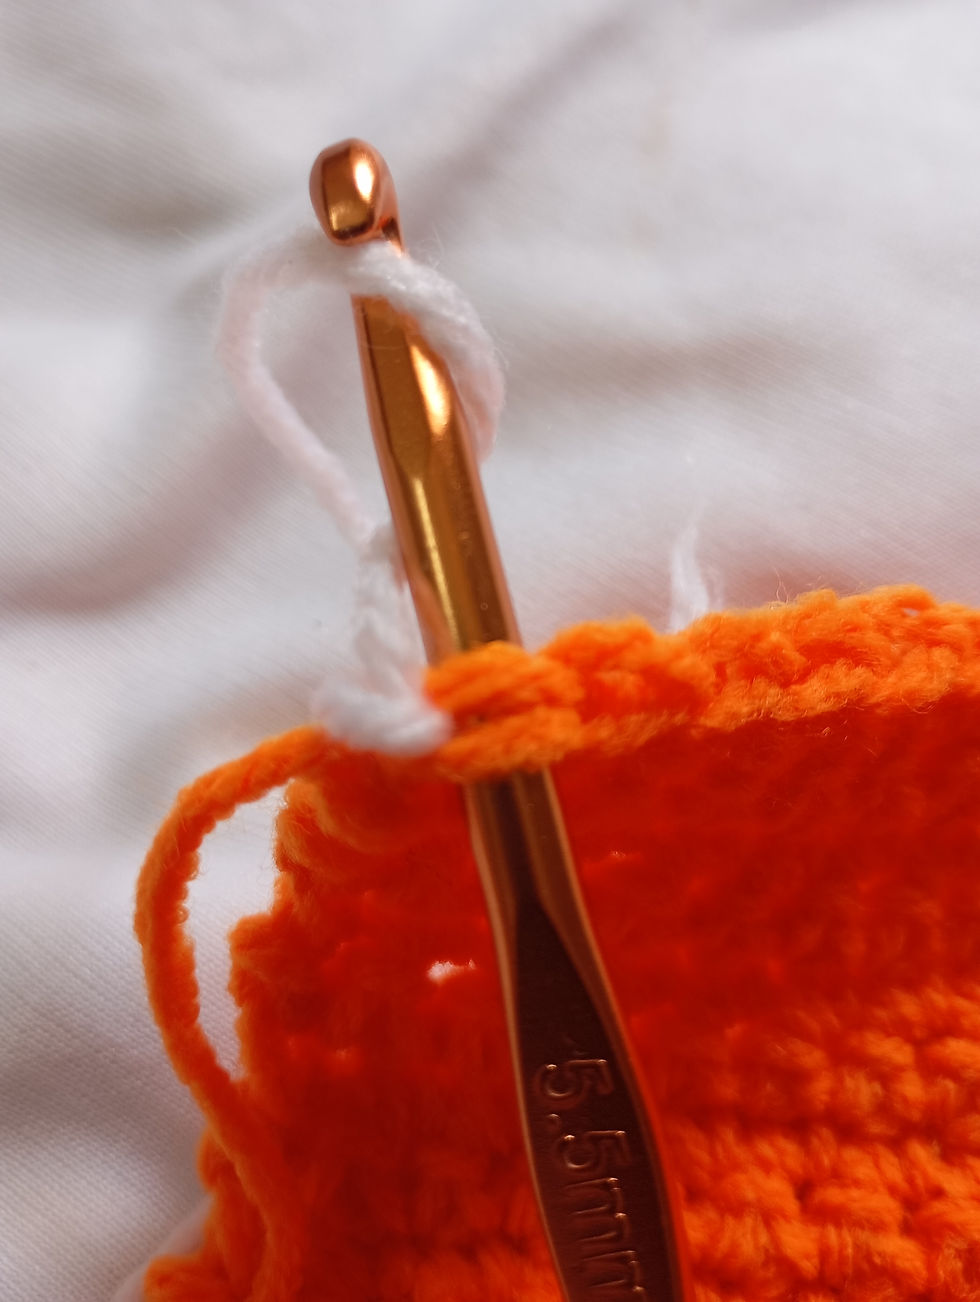
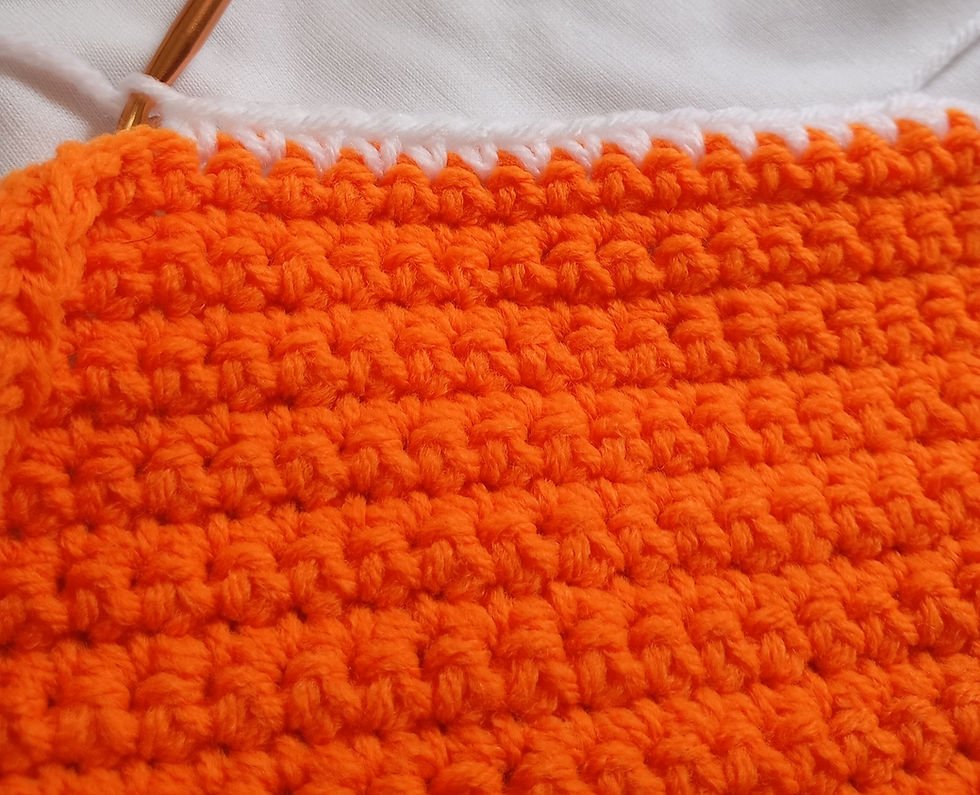
Change color and work 1 round of single crochet in white for the edging.
Insert the white yarn into the loop.

Tie the white yarn to the loop
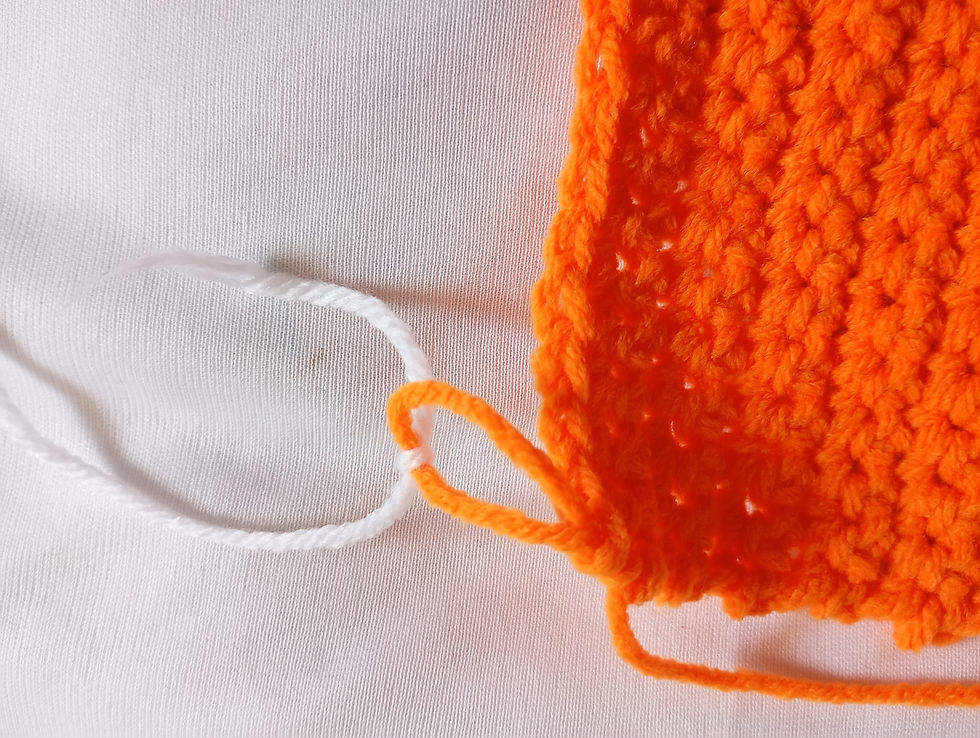
Pull the orange yarn to tighten the loop.

Start a row of single crochet around for the edging.


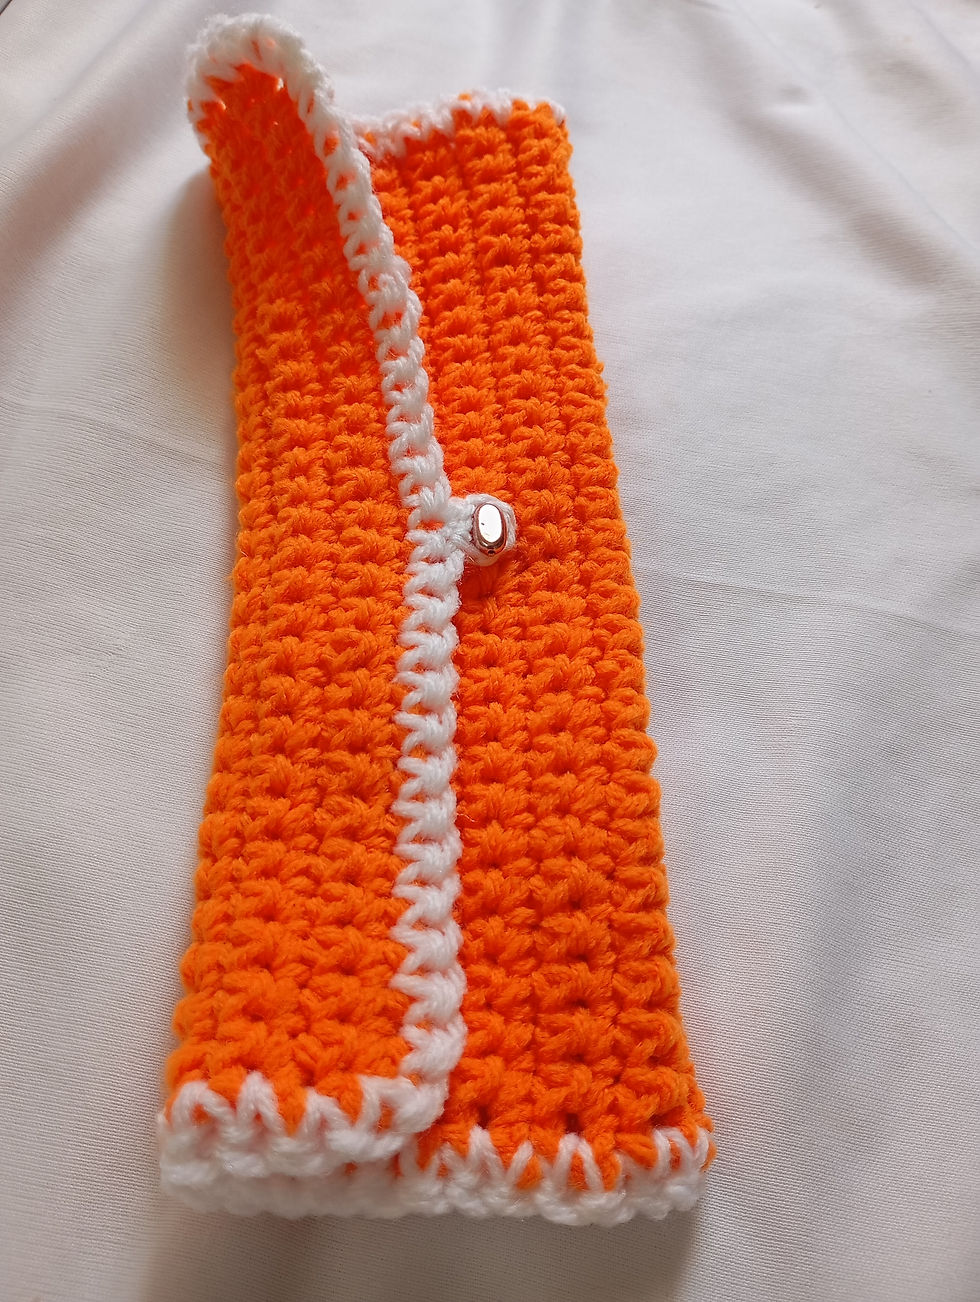
Step 6: Fold and Assemble
Fold about two-thirds up for the pouch
Leave the top third as flap
Stitch both sides:
Use neat, even stitches
Do not pull too tight
Fold the fabric as shown and use a yarn needle to stitch them together. Leave about 5 stitches on top for the flap.


Work in back loop only to create a fold for the flap. Stitch them together as shown using a yarn needle.

Weave in the ends and cut it.


Repeat for the other side.


Your pouch is almost ready.

Step 7: Add a Simple Closure
Button option
Sew a button in the center
Make a small yarn loop on the flap
Bead option
Attach bead to a yarn loop
Wrap around to close


Create a small chain loop that fits over the button for the flap closure. Don't make it too big or too small.

Your handmade pouch is ready!!!


What You’ve Learned Today
✔ Approximate stitch counting
✔ How size changes with chains and rows
✔ How to create a functional item
✔ Simple finishing techniques
💛A Small Note from Me
Your stitch count may not be exact every time, and that’s okay.
What matters is that your pouch works for your hooks.
That is the beauty of handmade.
Tomorrow, you’ll make something you can wear ✨

Comments